miércoles, 15 de octubre de 2014

Sync a local folder with remote folder FTP a combination of Robocopy and WinSCP

Here is the situation:

I need to update a FTP server with the latest documents from our client's server. Latest documents included New and Modified Documents.

I will be using 2 tools, both free.
1.- Robocopy, it is free and it is available on Win 7 and up, just open command prompt window and type Robocopy, press enter if you see this screen you have it, otherwise you can download it from the web.
2.- WINSCP this is a great Free FTP client that allows you to do Scripts. you can download it from: http://winscp.net/eng/download.php

before I do the steps let me explain the options i will be using from these 2 tools.
A.- Robocopy has an OPTION

  • /S : means include sub directories
  • /R:n: Means retry to copy the files N times, if you use 0 then it will skip that file
  • /MAXAGE:NDays: means exclude all the files older than Ndays or you can put a date.


B: WinSCP I will be using the Synchronize option

so now let do the steps:

I. Copy all the Newest Files from the Source Folder to a Temp Destination folder, to accomplish this I create the following DOS script:


rd d:\uploadimages /s /q
md d:\uploadimages

robocopy D:\Images d:\uploadimages /s /r:0 /MAXAGE:10

It is pretty simple, removing the temp folder I am using, "d:\uploadimages"
recreating it again and copying all New/Modified documents from the last 10 days, from my source "d:\images" to my Temp folder "d:\uploadimages"

II. Create the script to upload this temp folder to my FTP

First you need to define your FTP server in Winscp, follow this link http://winscp.net/eng/docs/ui_login


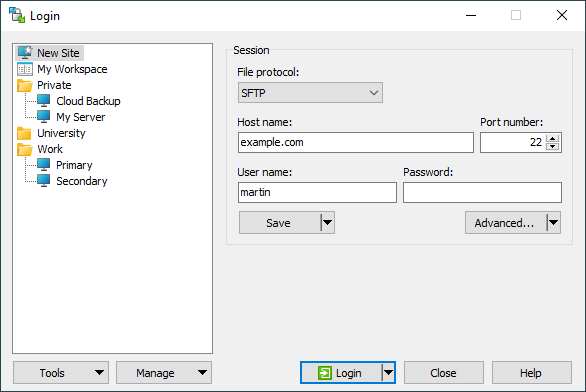
Test it and be sure you can connect.


Second. open notepad and type the following:

option batch on
option confirm off
open FTPSERVER
synchronize remote "d:\uploadimages" "/Client/Uploadimages"
close

exit


And save it as d:\upload.txt or any name, FTPSERVER needs to match the sever name in WinSCP.
what are we doing here is pretty simple, open a connection to the FTP server and synchronize the content of the Local folder to the Remote Folder, simple right?

now to execute this script you call it like this from Command Prompt:
cd "C:\Program Files (x86)\WinSCP\"
winscp.com /script=d:\upload.txt

you will see something like this:

and the program will compare and upload the new/modified files.

putting these 2 steps together you end with something like this:

------begin-----
rd d:\uploadimages /s /q
md d:\uploadimages
robocopy D:\Images d:\uploadimages /s /r:0 /MAXAGE:10
cd "C:\Program Files (x86)\WinSCP\"

winscp.com /script=upload.txt
------end-----
save it as a Batch file and add it to the schedule task, test it and make sure it works.

I hope this helps you.


Sources:
http://winscp.net/eng/docs/task_synchronize_full#automating_synchronization
http://winscp.net/eng/docs/ui_login
http://technet.microsoft.com/en-us/library/cc733145.aspx

martes, 1 de julio de 2014

RM Cobol Error 24,02 or 34,02 Exporting a File that will be bigger than 2 GB

So I was doing this COBOL Conversion and I got this error 34,02


so I found this great link

_________________________________________________________________________________

https://community.microfocus.com/microfocus/cobol/rm_cobol/w/knowledge_base/6937.recovery-encounters-cobol-io-error-2402.aspx

Recovery encounters COBOL I/O Error 24,02
This article explains how to resolve an Index File Recovery Utility 24,02 COBOL I/O Error.

Problem:

When using the RM/COBOL Index File Recovery Utility with a large file, it can fail with a COBOL I/O Error 24,02. This error indicates that there is not enough room left to write to the file. How is this resolved?

Resolution:

This error is caused by the fact that the Index File Recovery Utility opens index files in binary sequential mode. Therefore, in order to resolve this issue, you will need to create a configuration file that enables the use of large sequential files (over 2 GB). The steps to create the configuration file are as follows:
 Create a text file named runcobol.cfg in the same directory as the Runtime executable (runcobol).
 Add the following configuration record: RUN-SEQ-FILES USE-LARGE-FILE-LOCK-LIMIT=YES
 Save the file.
The configuration file will be loaded automatically and will allow you to successfully recover your index file.

_________________________________________________________________________________

I followed the instructions and it did not work. I got the same error again.

Then I just ran "runcobol.exe" and showed me this:

RM/COBOL Runtime - Version 7.00.02 for 32-Bit Windows (95/98/NT).
Configured for 10 users.
Copyright (c) 1985, 1986-1999 by Liant Software Corp.  All rights reserved.
Registration Number: NE-0000-05800-0010

Usage:    RUNCOBOL name [options]
Options:  [A=arguments] [B=buffersize] [C=configfile] [D] [I] [K]
          [L=libname] [M] [S=switches] [T=sortsize] [X=configmod]


Do you see it? the "C" option
so then i ran 

c:\>runcobol recover2 C=runcobol.cfg

and I got my 3 GB Exported file!!!! Yes over the 2 GB Limit 
You can see now it exported almost 800K records not just 242K as the initial screen


I hope this help you 

lunes, 23 de junio de 2014

From RM Cobol to SQL Server Without File Descriptions!!!

I was assigned to migrate an system that uses RM COBOL Data Files to a SQL Server.

The method could appear orthodox to some people, but this is what I had available.
Before I start let me tell you that the HUGE help that I had it, was that I  had access to the COBOL software.
Saying that let me explain briefly what I had it done.
  • Identify the DATA Files
  • Extract the data to text format using runcobol recover2 "Index File Recovery Utility", this is a utility from COBOL that will export Index files as TEXT files.


  • Now We have several Text files but when I opened them they have "non viewable ASCII chars", those represent the 4 bytes for the begin and end of a block. When you extract the data every block is treated as it is contained in a single record. To be able to Edit this Text File I had tried SEVERAL text editors, Notepad++, Textpad, Litepad, since the files created from the utility are bigger than 1 GB it was very hard to edit them. so I found HxD - Hexeditor from http://mh-nexus.de/en/ this tool save me a lot of TIME. You can see the 4 bytes that repeat, they are the END and BEGIN of new Block or Record in this case. 


  • So after I identified the Begin and End of the block 4 bytes chars, (for this example 42 11 00 00 are the HEX of each byte), I did a Ctrl-R and replace all 8 bytes by a "|" Pipe char followed by a New Line or Carriage Return char,  the purpose of this is to have a single line record. Now I was able to open the text file and SEE the Data at least it was more organized that the RAW data you obtain from the COBOLutility. For this task I used HxD to do the replace.


  • The next 2 images show how the raw data was aligned before and after of replacing the 4 bytes at the begin and at the end of each block.
This is the RAW Data
 This is the Data after being fixed

  • The next steps are pretty simple you need to Import the text files to a SQL DB using SSIS and from there feed your application database, as I mention at the beginning of this article my advantage was that I was able to use the Cobol Application and using that combined with the readable text files made it really easy to identify the columns in each table.

NOTE:
  • One thing that I need to add to this article was that I am not sure if the COBOL files had any COMP or COMP3 fields but when I export them as Text files I found several numbers that have a letter at the end like this little sample:
AMOUNT
0000000600}
0000000570}
0000000735L
0000000009{
0000000891L
0000000400{
0000000606C
0000000400{
0000000400}
0000000400{
0000000549C
0000000870}
0000000050{
0000000400{
0000000840C
0000000400{

  • There is a simple logic that you need to applied to obtain the right value, you need to replace the non numeric char for a number as is being describe in the script bellow


lunes, 31 de marzo de 2014

Upgrading your Office/Home from Windows XP


This task seems to be very easy, just insert the new Windows Disk and upgrade your windows XP machine just clicking next ... right?

well you need to do some work :)

there are 2 things associated to your Windows XP: Hardware and Software

Let start with Hardware: do a list of the hardware in your office/Home: Scanner, Printers, Faxs, Cameras, etc anything that you need to have it attached to your pc
to acomplish your daily duties. After creating the list you need to go to the hardare provider website and check if the hardware is supported by the new windows,
if they have Drivers, or see if they have a replacement that is compatible with it.

About Software, as well as Microsoft is closing Support to Windows XP, several companies will do too, like Oracle and Adobe, so create your second list
and add to it only the software that you really need, again you need to check your software provider and verify if there are new version available for the new OS.

This process should not be really painfull just be organized and the upgrading procedure will be fine and smooth.

Notes:
Keep in mind that upgrading to new OS probably will require more CPU and memory.
Based on Wikipedia, Win 7 was release on October 22, 2009,  4.5 years ago. http://en.wikipedia.org/wiki/Windows_7
DONT UPGRADE TO WINDOWS VISTA PLEASE! (it could happen)
There is a big sector that still uses Windows XP http://en.wikipedia.org/wiki/Usage_share_of_operating_systems